

When it comes to DIY projects, a common assumption is if you have the time, the money, and the know-how, then you will not encounter barriers. If you want to tile your floor, lay down some floor tile! However, tile is much more complicated than you might imagine. This leads me to the first step in the tile process that many DIYers skip that may ultimately ruin their tile dreams:
Step 1: You need to figure out if your floor can support tile in the first place.
This first post will focus on deflection, floor joists, and subfloors. While we generally think of our floors as the material we walk on to get from room to room, there are additional layers to the floor that must be considered before you choose a tile. All floors typically have two or three layers: a subfloor (the base of your floor: usually plywood or OSB [oriented strand board]), underlayment (a material that exists as a buffer between the subfloor and the flooring material), and the finished flooring material (what you walk on: linoleum, wood, vinyl, tile, etc.).
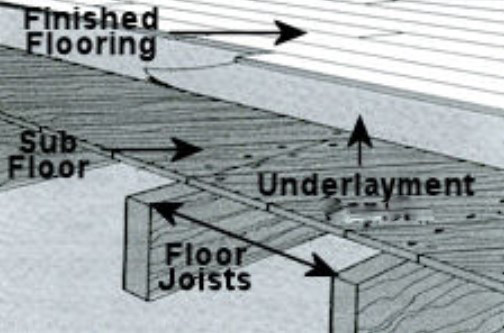
The subfloor is essentially the base of your floor. The subfloor is screwed into and glued onto the joists (the long wood beams spaced evenly across the expanse of a flooring plane that support the floor). The joists connect to the main support beams of the structure. The subfloor is what construction workers walk on during the process of framing and building a house. Here is an example:

You need to know a few things about your joists and your subfloor before you take on the task of tiling. Why? Because all flooring structures have different levels of deflection. Deflection is essentially how stiff the floor is or how much weight a flooring structure can handle without bending too much. One way to illustrate deflection in a visual manner is to imagine placing a thin plank of wood across the top of a swimming pool so people can walk across the plank to get from one side of the swimming pool to another. If that plank of wood is too narrow or weak, it is going to feel unstable, bend, and even buckle as people walk across it. This is deflection. You have probably witnessed deflection issues in homes before. Have you ever walked across a floor and noticed what feels like unsupported soft areas under your feet? Have you walked in a room and noticed the floor seems to shake underneath you or dip in certain spots? This is likely due to deflection. Too much deflection is the worst case scenario for tile because it will cause the tile and grout to crack and fail. If the floors are weak and you do not want to take measures to strengthen the joists, you are better off sticking with linoleum, vinyl, or wood because those are light weight materials.
So, how do you determine the deflection limit for your floors? It is a complicated mathematical formula, so thank goodness the John Bridge Tile website has a deflection calculator to save us all the headache: https://www.johnbridge.com/vbulletin/deflecto.pl
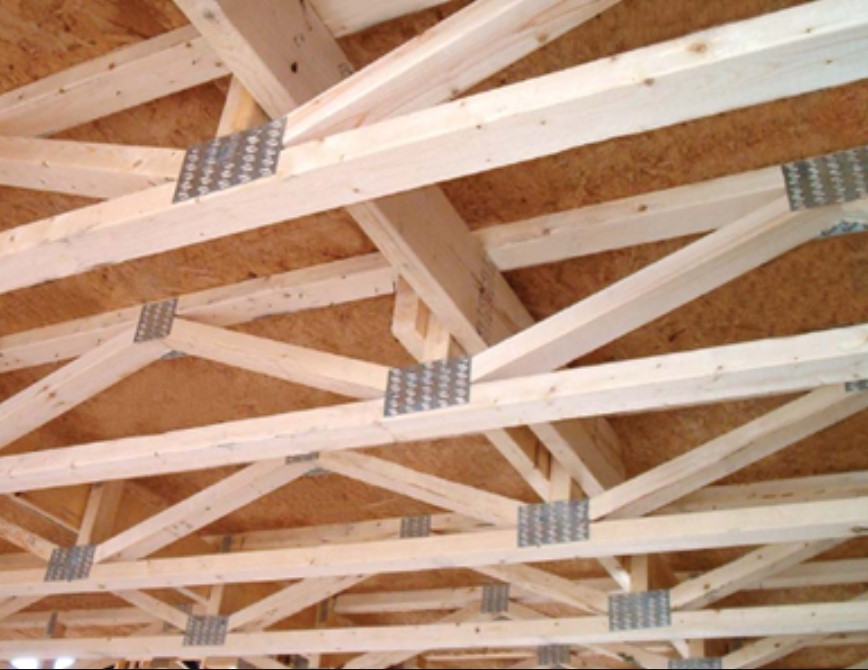
In order for the Deflecto to work its magic, you need to measure joist spacing (measure from the center of one joist to the center of the joist right next to it), the height of the joist (measure from where the joist meets the subfloor to the bottom edge of the joist, I think of this as the depth of the joist), the length of the joist (the distance from the beginning of the joist to the point at which it connects with a structural beam), and finally the width of the joist (measure how wide the joist itself is). Obviously, this is much easier if you have an unfinished ceiling area to look at (like a basement).It is also good to know what kind of material your joists are. Here is an awesome video demonstration from Sal DiBlasi https://www.youtube.com/watch?v=74BDTI67S1M&ab_channel=SalDiBlasi (Sal DiBlasi’s channel on youtube is amazing! I’ve learned SO much from watching Sal’s videos on tile installation. He’s a tile contractor in Boston with decades of experience and knowledge. You will see me reference his channel frequently in all my posts about tile.) *NOTE: One big exception to the deflecto calculator is that this is based on the most traditional basic style of joists (like the picture above, long wood boards of equal width all the way across). If you have a truss joist system or an I-Joist system, this calculator will not be accurate. However, I-joists are less prone to deflection than regular joists, so it is safe to assume the deflection value for I-joists is a little higher than that of regular joists.
This is what I-joists look like:

This is what truss joists look like:
Deflection standards differ based on the type of tile you use.
The deflection value for supporting ceramic tile is L/360. The deflection value for supporting stone tile is L/720. In other words, your floor needs to be twice as stiff to install stone tile because stone tile is heavier. This is one reason that many people choose porcelain or ceramic tile that looks like stone instead of using actual stone tile on their floors.
Once you figure out the deflection value of your floor, you have to make a couple decisions. If your floor meets the standard for your tile selection, great! You can move ahead to the next step. If you floor does not meet the deflection standards, there are a few things you can do to help stiffen your floors, including adding a thick layer of exterior glue C grade plywood as underlayment (this only adds a little more strength), sistering the joists, and more. I highly recommend going to the John Bridge Tile forums for specific advice on this (and all things related to tiling, for that matter) There are many expert tile installers on the site who are friendly and helpful. Honestly, if you want the most accurate advice on floor strength, a structural engineer is the ideal person to contact, but I have a feeling you’re interested in DIY because you want to save money!
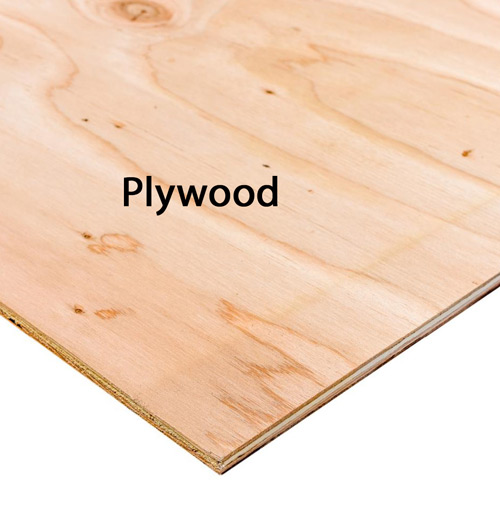
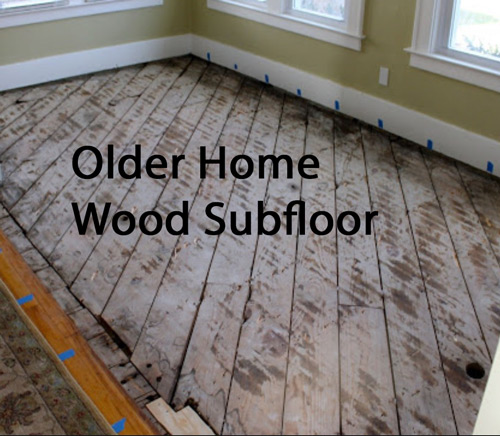
Subfloor: Another factor to consider before tiling is the condition of your subfloor. First of all, what material is your subfloor and how thick is it? The most common types of subfloor in more modern homes are plywood, OSB (oriented strand board), and concrete (particularly in basements or on the first floor of a home that is built on a concrete slab). The plywood and OSB typically have tongue and groove edges so the boards fit together without large gaps between them. Older homes often have some form of wood subfloor. Here are some examples:

The thickness of the subfloor often depends on the distance between the joists. Most homes have joist spacing from 16″ to 24″ apart. Essentially, the farther apart the joists are, the thicker the subfloor should be. For instance, the minimum thickness of a plywood subfloor for joists spaced up to 16″ apart is 15/32″. Many people in the construction industry say subfloor thinner than 3/4″ should never be installed, regardless of spacing. The minimum thickness of a plywood or OSB subfloor for joists greater than 16″ apart is 3/4″. In reality, it is not uncommon for people to discover that their subfloor is only 5/8″ thick, even in more modern homes, so it is important to know how thick your subfloor is! All these measurements aside, when it comes to supporting tile, the thicker your subfloor, the better.
You also need to determine the shape your subfloor is in. Does it look like new? Is it level? Are there large holes in it? Is there mold or water damage (if so, watch this)? If there is any surface damage to your subfloor, you need to address those issues before moving on to the next phase of this project.
